Are you looking for a file download manger for WordPress? While you can simply upload a file and add a download link in your post, it’s not scalable. A WordPress file download manager can help you easily manage, track, and control permissions on file downloads. You can even use it to sell file downloads. In this article, we will show you two easy ways to to manage, track, and control file downloads in WordPress.
Method 1. Managing File Downloads in WordPress Using WooCommerce
This method is easier and uses the most popular eCommerce plugin for WordPress, WooCommerce. It is perfect for users who want to sell file downloads or users who want to make an online store.
WooCommerce can be used to sell both digital downloads and physical goods. You can also use it as your WordPress download manager to offer free downloads. WooCommerce allows you to easily track users, manage downloads, and view stats.
Let’s get started.
The first thing you need to do is install and activate the WooCommerce plugin. For more details, see our step by step guide on how to install a WordPress plugin.
Upon activation, you need to click on the run setup wizard button to configure WooCommerce.
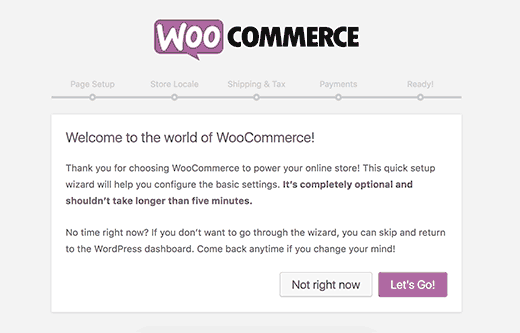
Follow the on-screen instructions to finish the wizard.
Once you are done, you can go to Products » Add New page to add your first file download as a product.
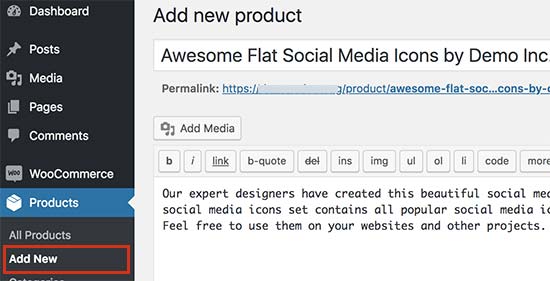
First, you need to provide a title for your product and its description. After that, scroll down to the ‘Product data’ section.
From here you need to check the ‘Virtual’ and ‘Downloadable’ checkboxes to indicate that the product is a digital download.
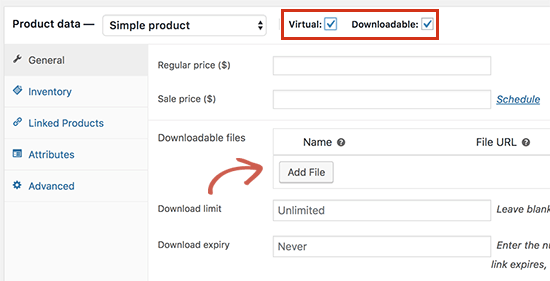
Next, you need to enter the price. If you want to add a free download, then you can set the price to 0. Otherwise, you can set a price for the download file.
After that, click on the Add File button to upload your download file.
You can review other options on the page. For example, you can add product images, add a short description, select product category, and more.
Once you are satisfied, click on the publish button to make your product available.
Your users can now go to the product page and add the product to their cart. If it is a free product, then they will be able to checkout without adding payment information. Otherwise, they will check out by making a payment.

After the checkout, the file will be downloaded to the users’ browser.
To view how each of your file download is doing, you can go to WooCommerce » Reports page. From here you can see your sales by date, by products, and categories.
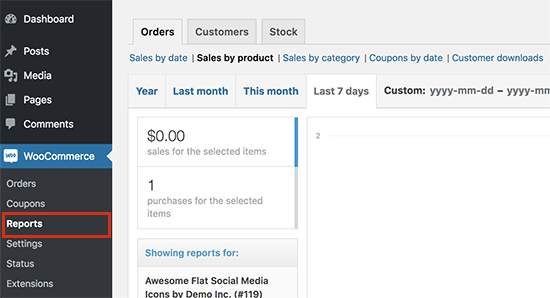
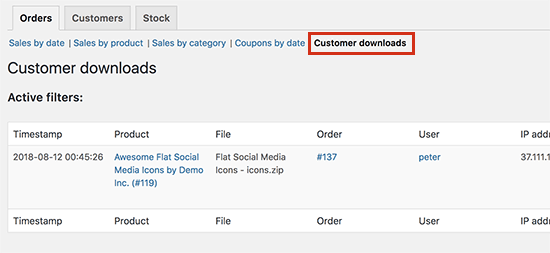
You can also view customer downloads report which will show you a log of file downloads by customers.
Method 2. Managing File Downloads Using WordPress Download Manager
This method is recommended for users who want a dedicated download manager for their website. WordPress Download Manager allows you to manage both free and paid file downloads.
It lacks some functionality and extensibility of WooCommerce, but it makes up for that by offering more specific features you’d want to see in a file download manager for your website.
First thing you need to do is install and activate the WordPress Download Manager plugin. For more details, see our step by step guide on how to install a WordPress plugin.
Upon activation, you need to visit Downloads » Add New page to add a new file download.
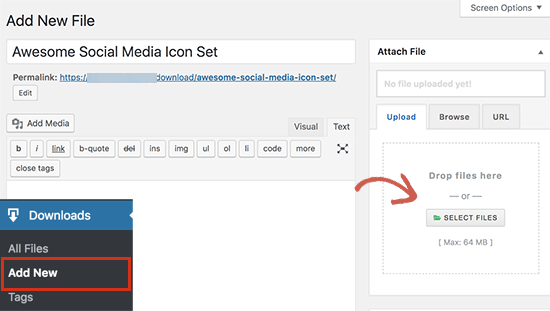
First, you need to provide a name and description for this download. Next, you need to click on the add files button on the right column to select or upload download files.
After that, you need to scroll down to the ‘Package settings’ section. From here you can set different settings for the file download.
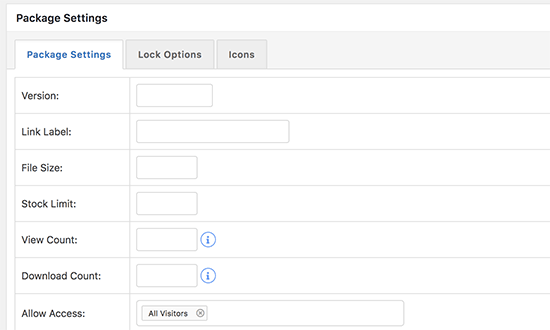
Next, you can switch to the Lock Options tab where you can set different rules to restrict file downloads. By default, the plugin allows you to restrict downloads to users agreeing to terms, a password lock, or a recaptcha lock.
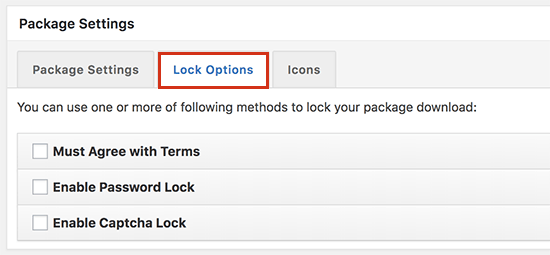
Once you have configured the Lock Options, you can click on the icons tab to select an icon to display next to the download.
![]()
After you’re done, go ahead publish your file download.
Adding File Download to a WordPress Post or Page
WordPress Download Manager makes it easy to add file downloads anywhere on your website.
Simply go to Downloads » All Files page and copy the shortcode next to the file you added earlier.
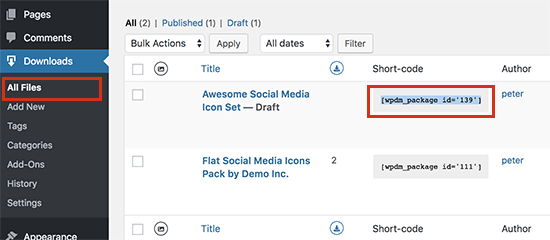
You can now paste the shortcode in any WordPress post or page content where you want to show the file download button.
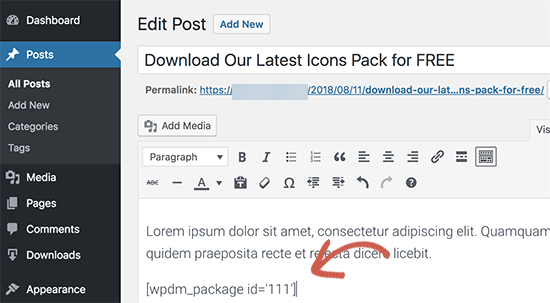
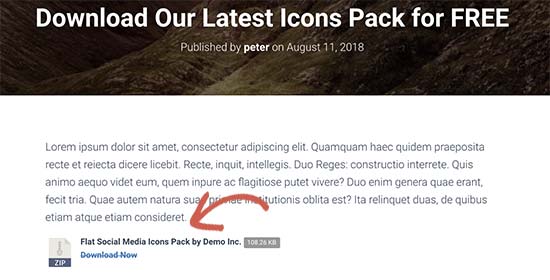
Once done, click on the save or publish button for your post/page and visit your website to see the file download in action.
Adding Paid File Downloads in WordPress Download Manager
WordPress Download Manager also allows you to add paid file downloads to your WordPress site.
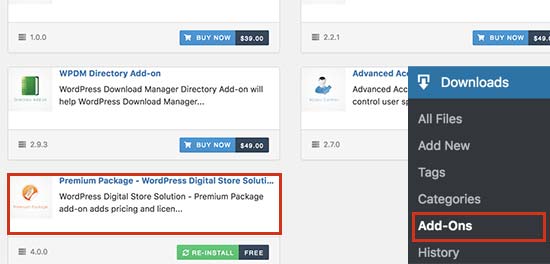
To add paid downloads, you will need to visit Downloads » Add-Ons page. Under the free addons tab, you need to locate ‘Premium Package – WordPress Digital Store Solution’ add-on and then install and activate it.
Upon activation, you need to visit Downloads » Settings page and then click on the ‘Premium Packages’ tab.
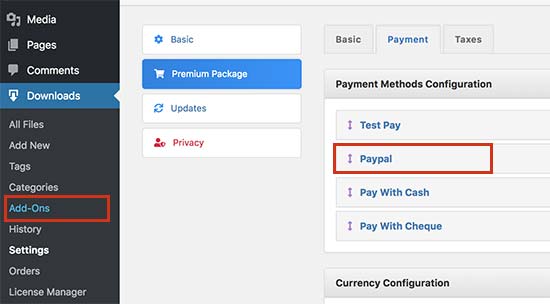
From here, you can configure payment settings for your paid file downloads. By default, the plugin allows you to accept payments using PayPal. You need to click on the ‘Payment’ tab to add your PayPal email address.
Don’t forget to click on the ‘Save Settings’ button to store your changes.
You can now go to Downloads » Add New page to add your file download. Under the ‘Package Settings’ section, you will now see a new tab to setup pricing options.
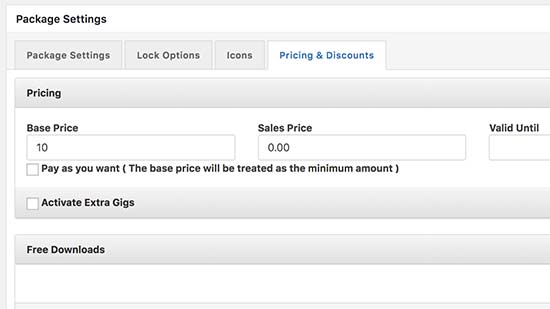
After adding your file download and setting up pricing, you can publish the download.
Next, you need to visit Downloads » All Files page to copy the shortcode. After that, you can add the shortcode to a post or page to display the file download.

Tracking File Downloads in WordPress Download Manager
WordPress Download Manager also allows you to easily view your download counts and history.
Simply go to Downloads » All Files page, and you can view download counts next to each item.
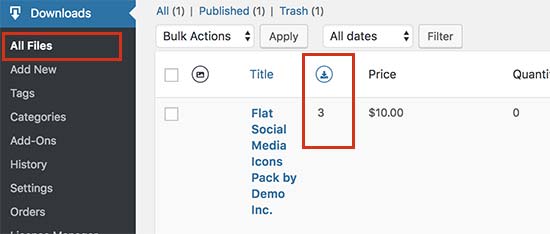
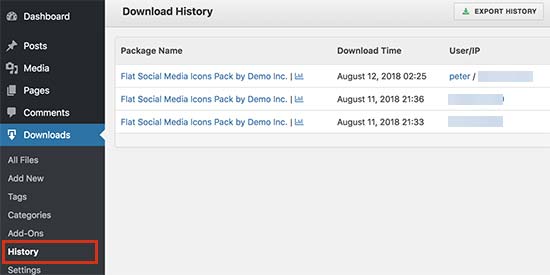
You can also view a log of all download activities on your website by visiting Downloads » History page. You will see recent download activity with usernames and IP addresses.
We hope this article helped you learn how to manage, track, and control file downloads in WordPress. You may also want to see our step by step guide on how to create a membership site in WordPress.
If you liked this article, then please subscribe to our YouTube Channel for WordPress video tutorials. You can also find us on Twitter and Facebook.
The post How to Manage, Track, and Control File Downloads in WordPress appeared first on WPBeginner.
Source: Wordpres
The post How to Manage, Track, and Control File Downloads in WordPress appeared first on TuneMaster.ml.


No comments:
Post a Comment